 ScreenHunter Free is a Imaging and Digital Photo application like Indigo, DWG Viewer, and Nik Collection from Wisdom Software Inc. ScreenHunter Free Latest Version Overview ScreenHunter Free FAQ (Frequently Asked Questions).Best ScreenHunter Free Alternative Apps for Windows.Steps to uninstall ScreenHunter Free in Windows 95, 98, Me, NT, 2000.Steps to uninstall ScreenHunter Free in Windows XP. 
0 Comments
 
Supported OS: Windows 11, Windows 10, Windows 8.System Requirements and Technical Details Lightshot is also available for Chrome & Firefox. 
Select an image on your screen and find dozens of similar images. You can edit screenshots instantly when taking them or later using a powerful online editor.Upload your screenshot to the server and get its short link right away.Screen captures are saved locally or to Lightshots free cloud storage. A simple and intuitive user interface makes your work with the app more accessible and faster. The Lightshot web extension for Firefox Quantum takes and edits screenshots, right from the browser.It is in the screen capture category and is available to all software users as a free download. LightShot is licensed as freeware for Windows 32-bit and 64-bit operating systems without restrictions. This is a free application in which you can handle all the captured contents within a short time. The application supports various image file formats, which include JPG and PNG. It also comes with a text editor for adding comments. The manipulation tool has modification settings ideal for adding visual effects like color and even drawings like you may do when you want to highlight some areas. The application supports the cropping functions such that you can choose the areas within the desktop which you can capture. Free Download Lightshot for Windows PC to capture screenshots of selected areas from your desktop screen and edit, print, or share them online on various social networks.Īs an alternative program, you can also FREE download ShareX - Screen capture, file sharing, and productivity tool.  
-O no-touch-required prevents you from having to touch the YubiKey every time you want to use the key.-O application=ssh:* names the key, so you can identify it more easily later, very handy if you generate a few.If you do not know which one to choose, stick with ed25519-sk -t ed25519-sk is the key type, two options are possible ecdsa-sk and ed25519-sk ( sk stands for security key).Let's dive into the different parameters. It removes the need to manually ssh-add keys with nonstandard names and stores key passwords if set in the macOS keyring.Enter fullscreen mode Exit fullscreen mode The following stanza can be adapted and placed in ~/.ssh/config. D prevents ssh-agent from forking, and -a ~/.ssh/agent directs the agent to create a socket file at that location that is referenced in $SSH_AUTH_SOCK. It runs the command /usr/local/bin/ssh-agent -D -a ~/.ssh/agent. This plist was created using the launchd plist generator over at zerowidth. usr/local/bin/ssh-agent -D -a ~/.ssh/agentĪnd load it with launchctl load -w ~/Library/LaunchAgents/_ist. If you do, you can load it directly to the ssh-agent using ssh-add -K, or write the key handle and public key to disk using ssh-keygen -K It is your choice whether to use a resident key. For this reason, a good pin is important. Additionally, it may reduce the security of your ssh key as they could use it if they steal the hardware device. However, your key may or may not support it and only a limited number of resident keys may be stored on a device. The private key file is actually a key handle that cannot be used without the hardware token, however, the hardware token can also not be used without the key handle.Ī resident key solves this problem by storing the key handle on the device. When generating the key, ssh-keygen will create private and public key files that look similar to normal ssh key. If not, use options 3 or 4.Ī U2F attestation requires a key handle to be sent to the device. You must choose if you want to store the key handle as a resident key on the device. 
If it does not work due to device incompatibilities, fall back on ecdsa-sk (Options 2 or 4) You must choose between ed25519-sk and ecdsa-sk. Using it on macOS with full support for ssh-agent is a bit more complex. SSH 8.2 introduced support for using any U2F key in place of a private key file.  
Once you do, a window you open to let you select one or more images to be included in the. Learn how to Password Protect PDF Files, Compress PDF files, Convert PDF to Word, or Merge PDF files for free with DocFly. Start by clicking on the main input button for selecting your files. You can do this by dragging and dropping your images or you can hit the upload button and navigate to your images. To begin, upload one or up to 20 images to our conversion tool. This works for a wide range of image formats. 
It can also combine many different images into one PDF. That's why, if you're sharing a file or other document in an office environment, it's good to convert to PDF first. Our tool can convert an image to a PDF for free. 
You should convert from JPG to PDF to ensure that (1) the recipient will be able to read any text easily and (2) that the files are not modified or altered without a record. They may also be used to create larger objects (such as white papers or case studies) that need to be shared. JPG files are typically used to create objects like small logos and basic graphics. With DocFly you can convert multiple JPG to PDF and make a presentation of images with the resulting file. Simply, you can see the preview of the selected images online on the PDF maker. Also, unlike JPG, you can combine PDF files easily into a singular document. For making PDF file, select images online on the best PDF maker from images tool. This makes them great for sharing (as they take up less space), but not so great if you need very high quality images that look great at any distance. JPG files are image files that can be greatly compressed. Now that you know how to change JPG to PDF, you might be wondering why it's a good practice to follow.  
Thus, it is professional to safeguard your data and files.ģ Effective and Reliable Ways to Backup Hard Drive Windows 10/8/7 MiniTool ShadowMaker can help you to upgrade your PS4 hard drive without data loss with its Clone Disk feature.Ģ Reliable and Powerful MiniTool SSD Cloning Software (No Data Loss)īesides the disk clone feature, MiniTool ShadowMaker is also a piece of professional backup software which can help you to back up files, folders, partitions, disks, and the operating system. Thus, MiniTool ShadowMaker is strongly recommended. To upgrade PS4 hard drive without data loss, you can take a piece of third-party software. PS4 Hard Drive Upgrade – MiniTool ShadowMakerįirst of all, we will show you the first method to upgrade your PS4 hard drive. 
You can try either of them to upgrade PS4 hard drive without data loss. 2 Solutions to PS4 Hard Drive Upgrade Without Data LossĪs for PS4 hard drive upgrade, we will show you two solutions in the following part. However, do you know how to perform PS4 hard drive upgrade? How to upgrade PS4 hard drive without data loss? This post shows you 2 solutions to upgrade your PS4 hard drive. 
In the above situations, you need to upgrade PS4 hard drive. You want to increase performance speed.You want to add additional storage space to save more files.Of course, there are some other reasons for PS4 hard drive upgrade. 
So, you may need to upgrade your PS4 hard drive to store more files or improve the performance. When your PS4 has been used for a long time, more and more data will be stored on the hard drive. 2 Solutions to PS4 Hard Drive Upgrade Without Data Loss.Why Need to Upgrade Your PS4 Hard Drive?.Do you know how to perform PS4 hard drive upgrade without data loss? How to upgrade your hard drive when the PS4 hard drive is full? This post shows you how to upgrade your PS4 hard drive without data loss.   
You can use powerful AES256 encryption to password-protect a file and upload it directly you Google Drive. You can Encrypt a file before uploading it to Google Drive, and when someone downloads the file, they need to enter the password to unlock the file. Password Protect Files Before Uploading to Google Drive You can even set the permission of the file as editor, viewer, or commentator.ġ.You can restrict the files from downloading and protect your content.For everyone else the file is restricted. Enter the email address of the people with whom you want to share the file.Right-click on the file and click on the Get link option.Look for the file that you want to protect.You can use the context menu on Google Drive web to restrict the file and add ad only the email addresses of the people to whom you want to share the file on Google Drive. You can protect Google drive files from unwanted access by restricting with whom you share the file. How to Restrict File Access on Google Drive? Password Protect Drive Files Using G-Forms How to Restrict File Access on Google Drive?.  
That means each workspace has its own settings for layouts, JDKs, servers, etc.So you use a workspace to group related projects that share common settings. metadatadirectory in the workspace’s root. And to switch to another workspace, click File > Switch Workspace from the main menu.Eclipse stores preferences separately for each workspace in the. However, you can work in one only workspace in a working session of Eclipse. You must choose a workspace when starting Eclipse: There can be one or more projects in a workspace - which means you can work with multiple projects simultaneously. WorkspaceWorkspace is a directory on your computer - where the projects are stored. But all workbenches are used for only one Workspace. For example, when you are working on two projects - you can open two workbenches - each for one project. And a perspective contains Editors and Views.You can open multiple workbench windows simultaneously (via menu Window > New Window). A workbench window consists of one or more Perspectives. WorkbenchA window instance of the IDE is referred to as the Workbench. and configure the JAVA_HOME and PATH environment variables properly (See: How to set environment variables for Java using command line).The above package requires Java 8 or newer. Here’s the link to download the package Eclipse IDE for Java EE Developers:ĭownload Package Eclipse IDE for Java EE Developers Note: Eclipse IDE depends on JDK/JRE so make sure that you have JDK/JRE installed on your computer. Run the eclipse.exeprogram in the eclipse directory to launch the IDE: And if you want to have shortcuts on desktop and in Programs menu, you have to manually create them. 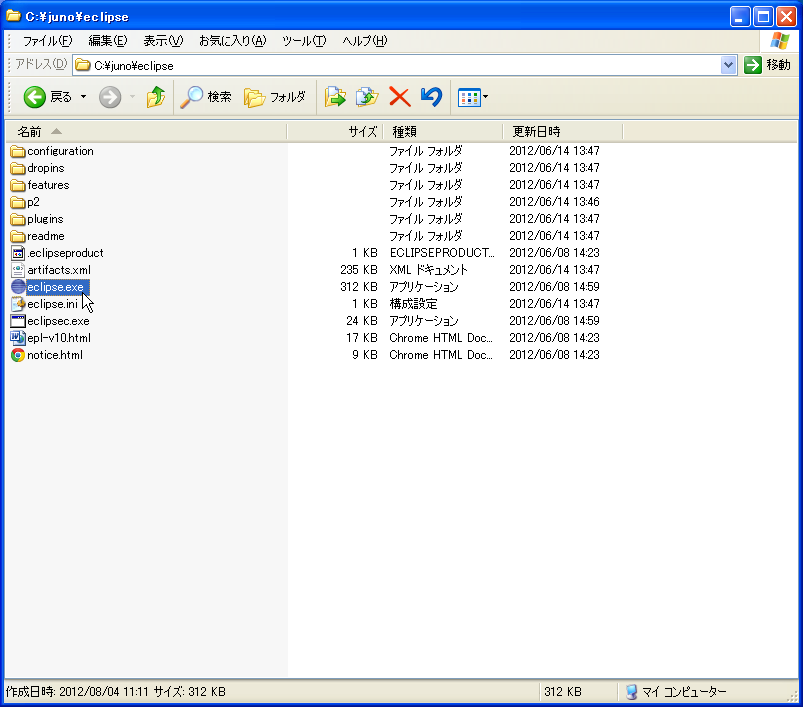%E3%81%AE%E8%B5%B7%E5%8B%95%E6%96%B9%E6%B3%95-01.png "eclipse for java developers windows 10")
Install Eclipse IDE by downloading a ZIP package:In this way, you download a zip/tar file for a specific package and extract the file on your computer. Here’s the link to download Eclipse Installer (64-bit):ĭownload 64-bit Eclipse InstallerNote that you need to choose a mirror site to download from. Then the installer downloads and installs the selected package onto your computer.The benefit of using Eclipse Installer is that you can install any desktop package of Eclipse in one place, and it also creates shortcuts on desktop and Programs menu for you.  
Since it was first released in 1998, Maya has become somewhat of a gold standard for character creation. Autodesk Maya - The Most Robust Character Creation Softwareĭeveloped for interactive 3D rendering in video games, animated films, television and movies, Maya has been used in everything from Game of Thrones and Spider-Man to Halo and numerous Pixar films. Meet the warriors of the BioWars Universe! 1. Now, let’s explore what each platform has to offer! 
Our roundup of the best character creation software in 2022 includes: 
To help you turn video game characters from your imagination into virtual reality, we compiled a list of some of the best character design software on the web. Once you pick the game genre you wish to focus on and select the tools to help you craft the game, next comes finding a good character creation software. They take users on exciting adventures, allowing them to experience new, imaginative worlds.Īnd while playing video games is great fun, creating them requires a lot of work. Video games are massively popular because they are entertaining and, more often than not, educational. In the United States, approximately 227 million people play video games, and in three-quarters of US households, there’s at least one gamer. 
7 Best Character Creation Software To Use In 2022īioWars game characters were devised using powerful character creation software. Then I look at iClone 6's Character Creator, which appears to be much more well structured with character design, but to get what I actually need, I'll need to effectively spend over $800. I already have DAZ 3D, but I can already tell that with just the default options available its ability to realize an original character is limited, requiring multiple purchases to get all the tools and options I feel will be needed. One big tool I'm looking for is a means of quickly creating a base human character, which I can then export into another program to modify, enhance, and ultimately animate. But since I'm starting from scratch, I need to find some tools to make my creative career just a little bit easier. This is a question that I have to seriously consider, mainly because I have hopes to one day become a professional creature and character designer, maybe even an animator if time allows. From the Synology desktop, single-click on CONTROL PANEL, then locate the SHARED FOLDER icon and double-click on it. You can lose all your data - Be warned !!! I would advise against newbie users to dive into Linux systems without really knowing what you're doing. To remove the Plex subvolume this did the trick:.Head over to /volume1, and you'll find the Plex subvolume there.Make sure you sudo -i to get root privileges. Once you're logged in with your admin user, you're not root yet.Use a tool like Putty or Bitvise to facilitate life if you want. SSH into your nas (Control panel, check Terminal).So, this is how you get your hands on the Plex subvolume on your Synology NAS *** Warning: Make sure you know what you are doing - this can result in data loss.*** That's the hardest part: finding the checkbox to activate SSH.Ĭheck if your Synology user has sufficient credentials to use SSH. 
In "control panel", find "terminal and SNMP. How to activate SSH in your Synology NAS: To set up your terminal access in your Synology NAS, check these screens: Things like Putty and Bitvise should ring a bell before you start. It is all about using a terminal and get into your NAS. 
Here's how to remove your Plex subvolume from your Synology NAS: That is a folder if you want that resides under /volume1 and is not that easy to get rid of And you want to get rid of the repository Plex. 
This is an article for people knowing their way around Linux, and who like to keep things clean. I recently relied on them and they went all the way (in fact, they proposed an RMA just because the unit was causing too much hassle).Īnyway. And their post-sale customer service that is above excellent. First of all, Synology has a great set of tools both hard- and software wise.  The photos were in the folder called ‘100CANON’ Inside the ‘DCIM’ folder are 3 more folders: This will show you the size of the folders, and the biggest folder will be the one with the photos in it. If you have a different camera and are unsure of where to find them, go ‘View’, ‘Show View Options’ then click the box that says ‘calculate all sizes’. Now on a Canon card the Photos are in the folder called DCIM. In this case my SD drive is called “SD MEMORY”Ĭlick on your SD drive to look at the contents of the drive. You should see a list of folders, and down the bottom under ‘Devices’ you can see your SD card! (If you can’t see a side pane on the left of the window, go to ‘View’ and select ‘Show Sidebar’) (For example click on a folder, or select “File” and “New Finder Window”) So I closed the Photos app and went looking for the pictures. I did not want these pictures in my Photos app because they were for a special purpose. Photos app opened automatically and asked if I wanted to import the photos. I grabbed the SD Card (it came out of a Canon EOS camera) and put it in this port. The little slot in the diagram above, between the headphone port and the USB port, is an SD-card slot. Importing them was easy – the macbook has an SD card port that I had not even noticed before. 
Someone recently handed me some photos on an SD card. |
AuthorWrite something about yourself. No need to be fancy, just an overview. ArchivesCategories |

 RSS Feed
